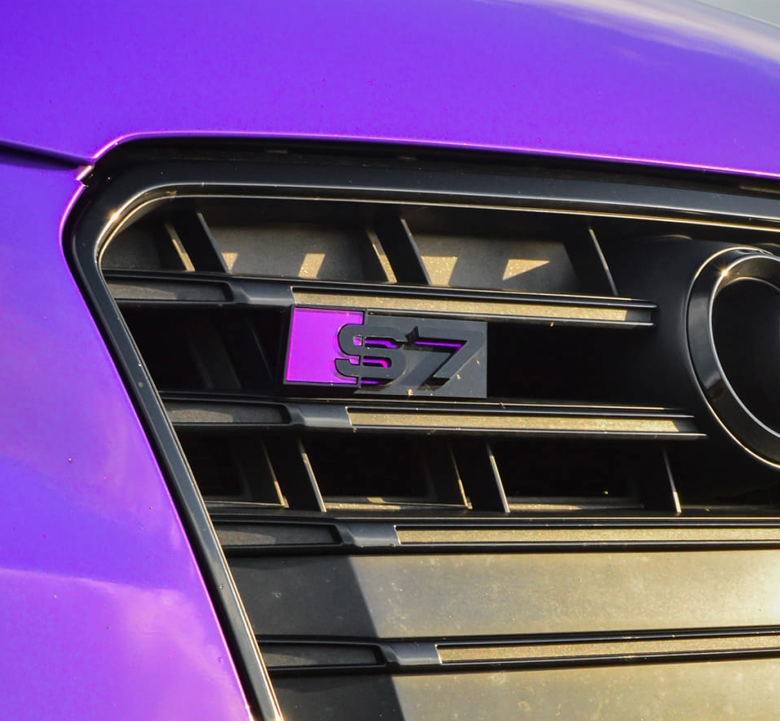
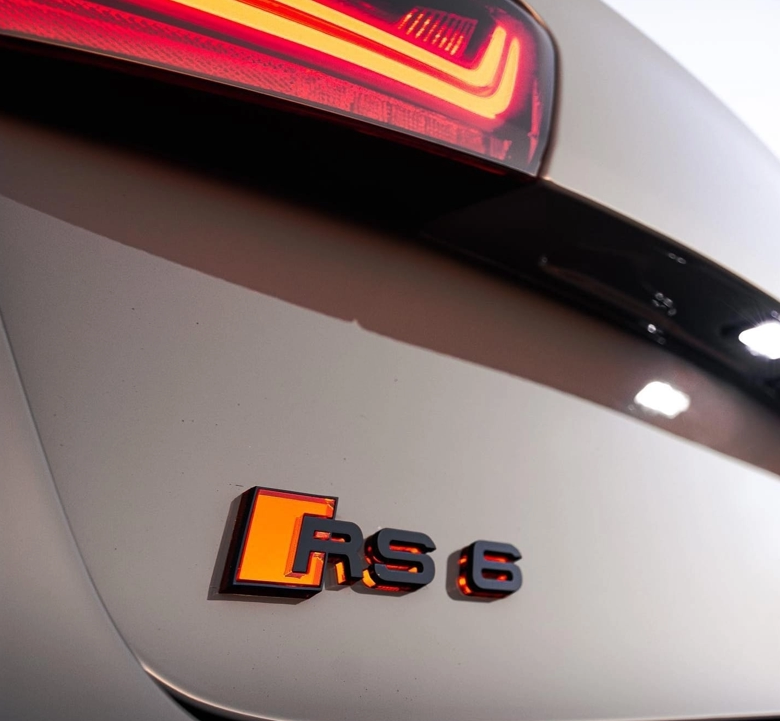
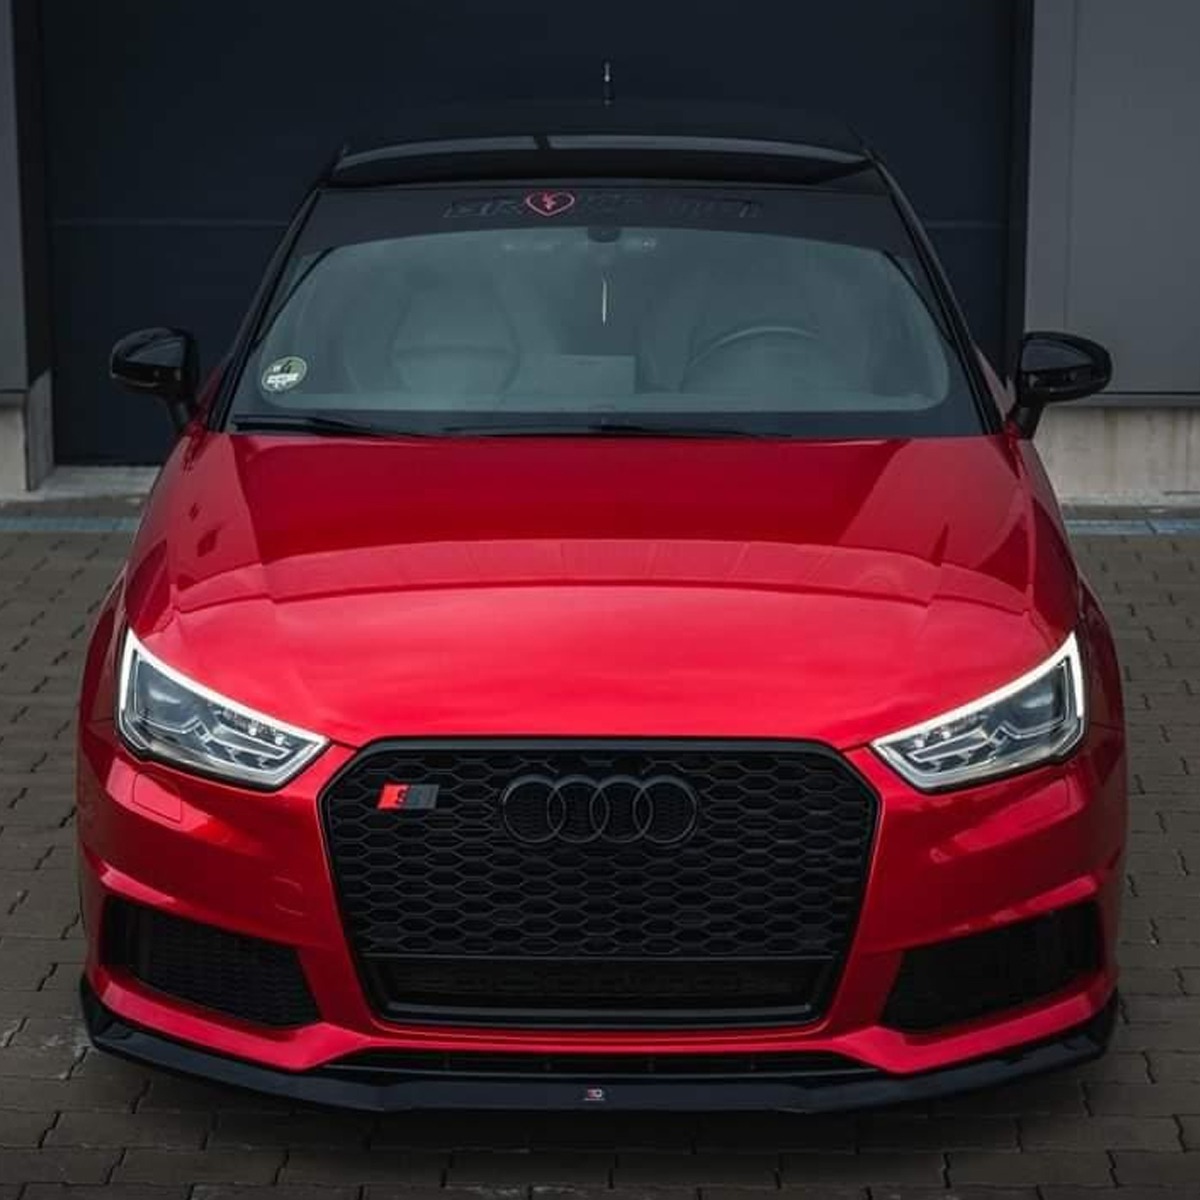
The unmistakable roar of Audi’s legendary 2.5 TFSI 5-cylinder engine transforms any chassis into a true giant-killer—but standard model badges don't tell the full story of your monumental build. Upgrading to our custom "RS" variants creates a seamless, aggressive profile that looks bespoke right from the factory, letting everyone know exactly what powers your swapped machine.
Flawless Compatibility Designed to complement the ultimate engine conversion. Our premium badges are meticulously engineered to guarantee a perfect fit across all custom DAZA, DNWA, and CEPA swapped platforms:
[Volkswagen Platforms] (Perfect for 5-cylinder swapped Golf, GTI, and R models)
[Audi A3 / S3 Platforms] (The ultimate finishing touch for sleeper 8P, 8V, or 8Y builds)
[Universal Fitment] (Engineered to mount flawlessly on any custom 5-cylinder converted chassis)
Installation Requirements Proper surface preparation is essential for a factory-perfect finish. To protect your vehicle's paintwork, ensure optimal longevity against the elements, and maintain your warranty, this product must be applied by a certified auto-styling professional.
In-House Manufacturing & Custom Design We don’t just supply badges; we engineer and manufacture them. Whether you are looking for a rare colorway, a completely bespoke design, or a badge for an unlisted chassis, our design team can bring your exact vision to life.
Using a plastic trim removal tool, carefully release the OEM emblem from the grill. Work gently around the edges to avoid scratching the surrounding trim.
Wipe down the grill mounting area with isopropyl alcohol or a mild surface cleaner. Remove any dirt, debris or adhesive residue. Allow to dry fully.
Align the new emblem into the grill aperture, ensuring the correct orientation. The emblem should sit naturally in the original mounting location.
Insert the included stainless steel bolts through the emblem mounting points and through the grill. Fit the washers and nuts from behind, tightening each evenly by hand before final tightening to ensure a flush, centred fit.
Check the emblem sits flush and centred with no movement. Gently test for rattle — the emblem should be completely secure with professional, factory-quality fitment.
Clean the surface you are applying the badge to with isopropyl alcohol or a mild surface cleaner, making sure no residue is left behind. Allow to dry fully.
Carefully peel the backing layer from the rear of the badge. Only the adhesive layer should be left behind on the rear of the badge.
Place your badge on the desired surface, press firmly ensuring any air behind the badge is pressed out. Hold firmly for 30 seconds.
Stand back and enjoy the new subtle modification! The adhesive reaches full bond strength after 24 hours — avoid washing during this time.
Locate the desired position on the fender. If replacing an existing badge, use a plastic trim tool to carefully pry it off. If applying fresh, choose a flat area on the fender panel.
Thoroughly clean the fender surface with isopropyl alcohol or a mild surface cleaner. Remove all dirt, wax, and residue. Allow to dry completely before proceeding.
Hold the badge in place without removing the adhesive backing to confirm positioning. Use masking tape markers if needed. Ensure the badge is level and symmetrical with the body lines.
Peel the adhesive backing, align to your markers, and press firmly onto the fender. Apply even pressure across the entire badge for 30 seconds to ensure full contact.
Check both sides match in height and position. The adhesive reaches full bond strength after 24 hours — avoid washing or exposing to heavy rain during this period.
Got a unique idea, a specific colour combo, or a badge we haven't thought of yet? We love a challenge. Send us your vision and we'll bring it to life — same premium quality, made just for you.
